
티스토리 뷰
[Next.js] App 디렉토리에서 route handlers로 API 구현하기 - Vercel Postgres + Prisma 풀스택 구현
junvely 2024. 3. 20. 01:46[Next.js] App 디렉토리에서 route handlers로 API 구현하기
- Vercel Postgres + Prisma 풀스택 구현
1. Vercel Postgres 데이터베이스 설정
1. postgres와 vercel 설치
npm install @vercel/postgres
npm install -g vercel@latest
2. vercel에 프로젝트 배포 후 strorage에서 DB 생성(가까운 나라로) -> 프로젝트 연결(Connect Project) 확인(프로젝트명 맞는지 꼭 확인)

3. vscode 터미널에서 vercel 연결
vercel link5. DB의 .env.local에 있는 키들을 .env파일에 옮겨오는 작업 / 옮겨지지 않을 경우 수동으로 복사해서 붙여넣으면 된다.
vercel env pull .env
6. Next api 생성하여 postgres가 잘 연결됐는지 확인해 보기
나는 app 디렉토리로 구성하여 app/api/movie/route.ts 파일에 route handlers(공식문서 참조)로 api를 생성하였다.
page 디렉토리라면 pages/api/movie.ts 파일에 api routes(공식문서 참조)로 api를 생성하면 될 것이다.
import { sql } from '@vercel/postgres';
import { NextResponse } from 'next/server';

export async function GET(request: Request) {
  try {
    const result =
      await sql`CREATE TABLE Pets ( Name varchar(255), Owner varchar(255) );`;
    return NextResponse.json({ result }, { status: 200 });
  } catch (error) {
    return NextResponse.json({ error }, { status: 500 });
  }
}
api 주소에서 다음과 같이 나오는지 확인해 보자 -> ex) http://localhost:3000/api/movie
{
  "result": {
  "command": "CREATE",
  "fields": [],
  "rowAsArray": false,
  "rowCount": null,
  "rows": [],
  "viaNeonFetch": true
  }
};
7. 데이터베이스 샘플 테이블 추가해보기
import { sql } from '@vercel/postgres';
import { NextResponse } from 'next/server';

export async function GET(request: Request) {
  const { searchParams } = new URL(request.url);
  const petName = searchParams.get('petName');
  const ownerName = searchParams.get('ownerName');

  try {
    if (!petName || !ownerName) throw new Error('Pet and owner names required');
    await sql`INSERT INTO Pets (Name, Owner) VALUES (${petName}, ${ownerName});`;
  } catch (error) {
    return NextResponse.json({ error }, { status: 500 });
  }

  const pets = await sql`SELECT * FROM Pets;`;
  return NextResponse.json({ pets }, { status: 200 });
}
api 주소에서 다음과 같이 나오는지 확인해 보자 -> ex) http://localhost:3000/api/movie
{
  pets: {
    command: "SELECT",
    fields: [
      {
        columnID: 1,
        dataTypeID: 1043,
        dataTypeModifier: 259,
        dataTypeSize: -1,
        format: "text",
        name: "name",
        tableID: 12345,
      },
      {
        columnID: 2,
        dataTypeID: 1043,
        dataTypeModifier: 259,
        dataTypeSize: -1,
        format: "text",
        name: "owner",
        tableID: 12345,
      },
    ],
    rowCount: 1,
    rows: [
      {
        name: "Fluffy",
        owner: "John",
      },
    ],
    viaNeonFetch: true,
  },
};
위와 같이 나온다면 연결 성공!
2. Prisma 설정 및 데이터베이스 스키마 생성
1. Prisma 설치 및 초기화
npm install prisma --save-dev
npx prisma init
2. prisma/schema.prisma 파일에서 db의 env키가 맞는지 확인 및 샘플 스키마 생성
vscode에서 활성화 안된 것 같이 코드에 불이 안들어와도 당황하지 말기....작동은 되고 있다..
// schema.prisma

generator client {
  provider = "prisma-client-js"
}

datasource db {
  provider = "postgresql"
  url = env("POSTGRES_PRISMA_URL") // uses connection pooling
  directUrl = env("POSTGRES_URL_NON_POOLING") // uses a direct connection
}

model Post {
  id        String     @default(cuid()) @id
  title     String
  content   String?
  published Boolean @default(false)
  author    User?   @relation(fields: [authorId], references: [id])
  authorId  String?
}

model User {
  id            String       @default(cuid()) @id
  name          String?
  email         String?   @unique
  createdAt     DateTime  @default(now()) @map(name: "created_at")
  updatedAt     DateTime  @updatedAt @map(name: "updated_at")
  posts         Post[]
  @@map(name: "users")
}
3. Prisma 스키마를 기반으로 vercel 데이터베이스에 테이블 생성
npx prisma db push Prisma실행하면 다음과 같은 질문을 한다. 이미 앞에 테스트 했던 데이터베이스 테이블이 존재하여 삭제를 진행해도 되냐는 말이었다. y를 입력한다.

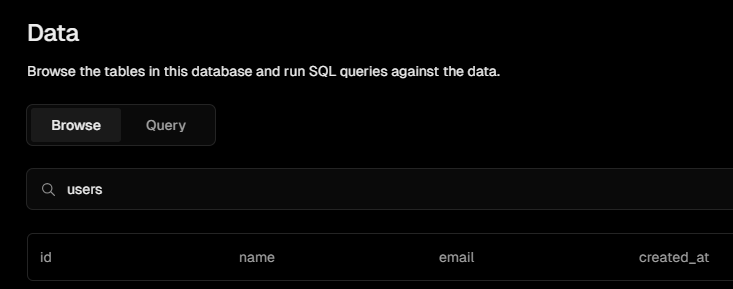
완료가 되면 vercel의 storage의 data탭에 들어가 보면 prisma에서 생성한 스키마로 데이터 Post와 User 테이블이 추가된 것을 확인할 수 있다.
+ Prisma Studio를 사용하여 초기 데이터를 추가할 수 있다...!
npx prisma studio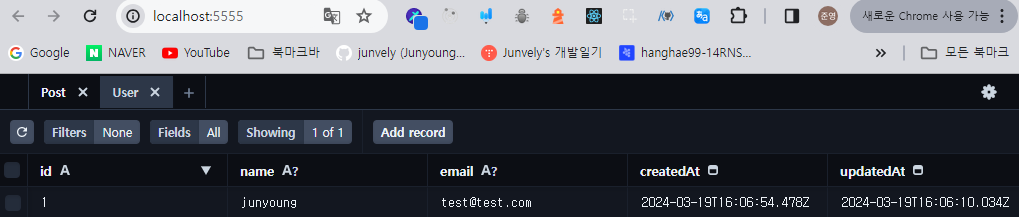
3. Prisma 클라이언트 설치 및 생성
1. Prisma를 사용하여 Next.js에서 데이터베이스에 액세스하려면 Prisma Client를 설치해야 한다.
npm install @prisma/client+ 만약 Prisma 스키마 파일이 변경될 경우, 다음 명령어로 prisma를 재생성 해야 한다.
npx prisma generate3. 루트 디렉토리에서 lib폴더 내부에 prisma.ts 파일을 생성한다. -> PrismaClient 인스턴스를 생성한다. -> lib/prisma.ts
import { PrismaClient } from '@prisma/client';

let prisma: PrismaClient;

if (process.env.NODE_ENV === 'production') {
  prisma = new PrismaClient();
} else {
  if (!global.prisma) {
    global.prisma = new PrismaClient();
  }
  prisma = global.prisma;
}

export default prisma;
이렇게 하면 DB에 연결 할 때 마다 Prisma Client에 연결하여 prisma 인스턴스를 사용할 수 있게 된다.
4. 이제 드디어 Prisma를 사용하여 간단하게 데이터베이스에 연결해 보자!
import { NextResponse } from "next/server";
import prisma from "../../../lib/db";

export async function GET(request: Request) {
  try {
    const data = await prisma.user.findMany(); // user의 모든 결과 가져오기
    return Response.json({ data }, { status: 200 });
  } catch (e) {
    return NextResponse.json({ message: "fail" }, { status: 500 });
  }
}
감격스럽게도 내가 설정한 api주소에서(http://localhost:3000/api/movie )
방금 업데이트한(Prisma Studio에서 )따끈따끈한 user 데이터를 확인할 수 있었다.....❗

오늘은 여기까지......🥹
다음 Prisma 공식문서에서 CRUD관련 메소드를 확인해 보자..!
Querying the database : typescript-postgresql
Write data to and query the database
www.prisma.io
<참고>
2. Prisma 연결
How to Build a Fullstack App with Next.js, Prisma, & PostgreSQL
Learn how to create and deploy a fullstack application with Next.js, Prisma, PostgreSQL, and Vercel.
vercel.com
'JavaScript > Next.js' 카테고리의 다른 글
| [Next.js] CSR의 Link 태그의 원리, Link와 useRouter의 차이점 (0) | 2024.03.18 |
|---|---|
| [Next.js] Data fetching하기, Loading 및 Error Handling (1) | 2024.03.17 |
| [Next.js] Route groups, Meta Data, dynamic routes 간단 정리 (0) | 2024.03.16 |
| [Next.js] Next.js Routing과 Hydronation, 'use Client' 알아보기 (1) | 2024.03.15 |
- Total
- Today
- Yesterday
- 깃헙
- flask 서버
- 항해
- http란 무엇인가
- 항해99
- Til
- 중첩 라우팅
- 타입스크립트
- github
- 리액트 라우터
- Flask
- 깃허브
- 드림코딩
- 자바스크립트
- 서버
- 항해 프로젝트
- 리액트
- git
- 깃사용법
- 깃 협업
- 리액트 페이지네이션
- 호이스팅
- MongoDB
- 깃
- useState와 useRef 차이
- import
- require와 import 차이
- URL
- 미니 프로젝트
- Python
| 일 | 월 | 화 | 수 | 목 | 금 | 토 |
|---|---|---|---|---|---|---|
| 1 | 2 | 3 | 4 | |||
| 5 | 6 | 7 | 8 | 9 | 10 | 11 |
| 12 | 13 | 14 | 15 | 16 | 17 | 18 |
| 19 | 20 | 21 | 22 | 23 | 24 | 25 |
| 26 | 27 | 28 | 29 | 30 | 31 |